Got the keys? Your next move is to make sure the place is exactly how it should be. A solid move‑in inspection checklist stops surprise charges and protects your deposit. Follow these five steps, capture proof, and stay one step ahead of any disputes.
Step 1: Prepare Before You Start the Walkthrough
Gather the right tools first. You’ll need a notebook or digital form, a pen, a flashlight, and a smartphone with enough storage for photos and video. A basic checklist template can be downloaded from many property‑management sites, but you can also create your own columns for room, item, condition, and notes.
Schedule the walkthrough for a time when the unit is empty and the lights are on. If you can, ask the landlord or property manager to be present; their signature on the form makes the record harder to dispute later. A signed baseline can help clarify the unit’s condition if questions about pre-existing damage arise.
Before you walk in, skim your lease for any clauses that require a joint inspection or set a deadline for reporting pre‑existing damage. Knowing the contract language helps you ask the right questions on the spot.
Finally, back up your digital notes in the cloud right after the walk. That way you have a timestamped copy that’s safe even if your phone dies.
Step 2: Inspect Every Room From Floor to Ceiling
Start at the front door and move room by room. Check walls, ceilings, floors, windows, doors, light fixtures, and outlets. Note any cracks, stains, chips, or missing hardware. Use a flashlight to see hidden damage behind baseboards or under cabinets.
For each room, record a quick status: "good," "fair," or "needs repair." If you find an issue, write a brief description and draw an arrow on the sketch if you’re using a paper form. This systematic approach catches things that renters often overlook, like a hairline crack in the ceiling or a loose hallway handrail.

Don’t forget closets, pantry shelves, and the exterior balcony if the unit has one. Small details, scuffed baseboards, a broken closet rod, or a cracked window pane, can become big disputes later.
When you finish a room, pause for a minute to double‑check that you didn’t miss a corner. A quick sweep ensures the checklist stays complete.
Step 3: Test Safety, Heating, and Structural Conditions
Safety devices get special attention because they affect health. Press each smoke detector’s test button; a chirp means the battery is alive. If it’s silent, note the issue and ask the landlord to replace the unit. Carbon‑monoxide detectors should be less than seven years old; check the manufacture date on the back.
Turn on the thermostat and set it to a comfortable temperature. Verify that the heating actually reaches at least 65 °F throughout the unit. In the bathroom, run hot water to see if the water heater holds temperature and watch for any leaks under the sink or around the tub.
Next, look for structural red flags. Walk the perimeter of each room and feel for any flex in walls or floorboards. Wide foundation cracks (over ¼ inch) or signs of water infiltration, like damp spots on the ceiling, are serious concerns. Document them with photos and mention them in the checklist’s “notes” column.
Use this checklist to record detector and heating-system checks before move-in.
Once you’ve verified safety gear and heating, write down any failures and request that the landlord fix them before you take possession. A written request creates a paper trail that supports your case if the issue resurfaces later.
Step 4: Photograph, Label, and Preserve Your Evidence
Photos turn words into hard evidence. Use your phone’s built‑in camera; the EXIF data automatically adds date, time, and location stamps that courts accept as reliable proof.
Take a wide shot of each room first, then zoom in on any damage. Include a common object, like a ruler or a coin, in the close‑up to show scale. For example, a 3‑inch hole in a bedroom wall looks tiny until you see a ruler beside it.
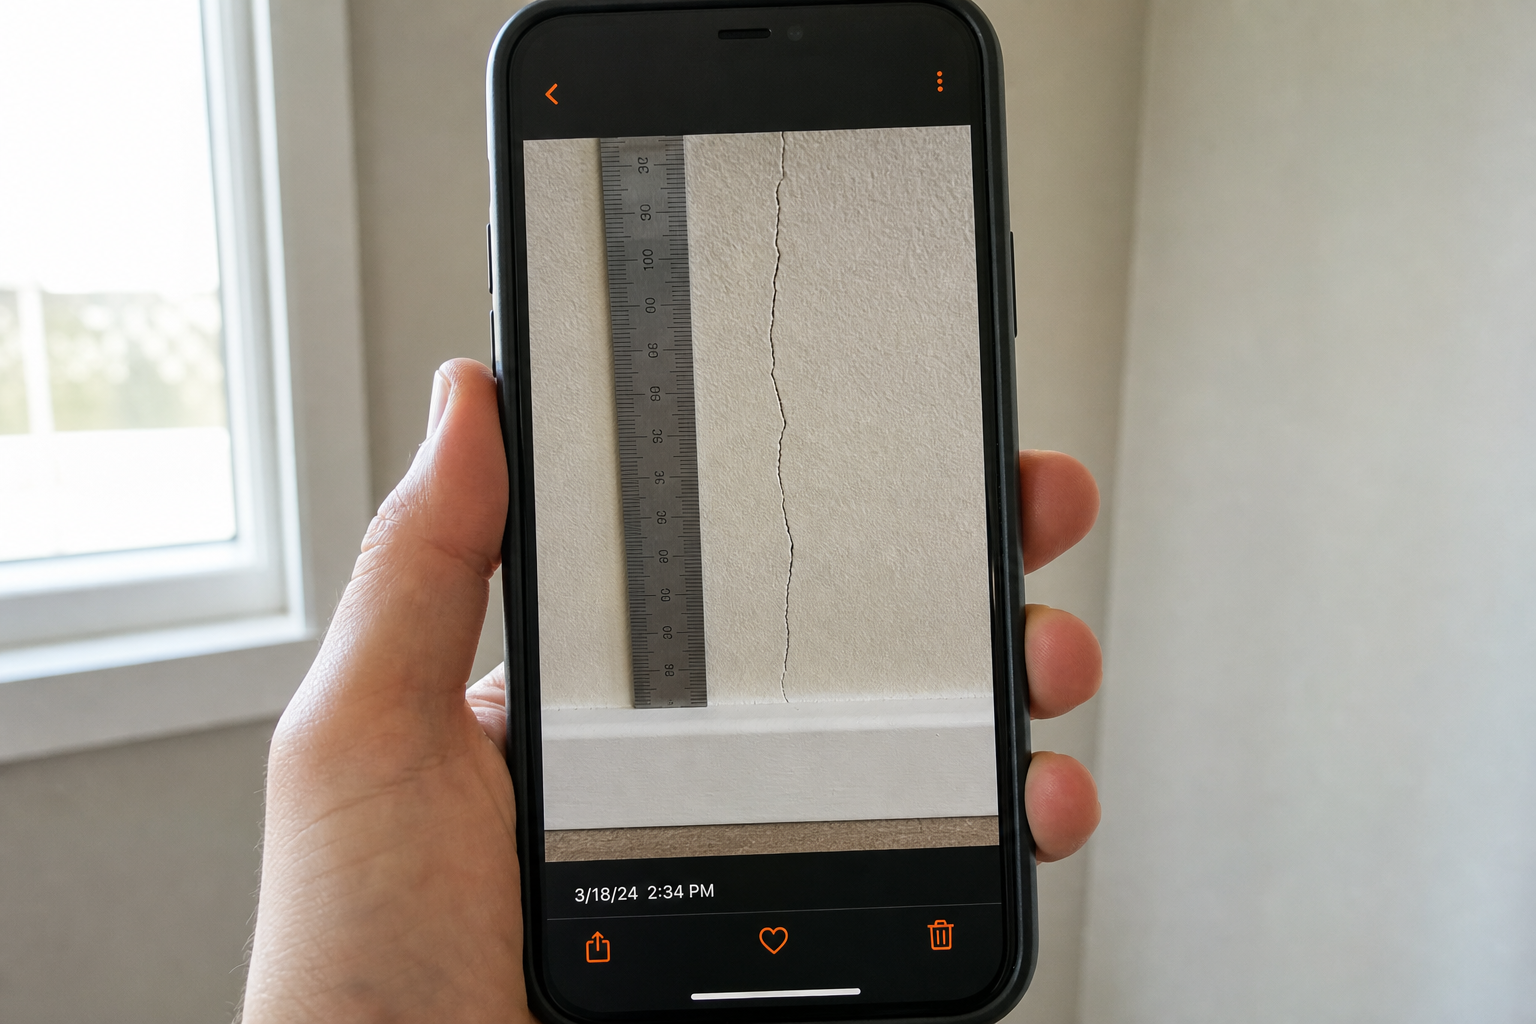
Label each file with a consistent naming scheme, such asUnitA_2026-08-09_LivingRoom_WallCrack.jpg. Store the files in a cloud folder that you share with the landlord via a shared link. The shared link creates a second timestamp when the folder is created.
After the photo session, record the same details in the written checklist. Match the photo file name to the note so you can cross‑reference quickly if a dispute arises.
Step 5: Compare the Checklist With Your Lease and Report Issues
Now line up your completed checklist with the lease clauses that talk about property condition, repairs, and deposit deductions. Most leases state that the landlord must provide a written itemized list of any deductions within a set number of days after move‑out. Knowing that language helps you spot any unfair charge later.
If you notice a discrepancy, say the lease says the landlord will repair any existing water damage but your checklist shows a leak that was already present, send an email right away. Attach the relevant photos and a copy of the checklist, and write a clear subject line like “Move‑In Inspection Findings, Unit A, 2026‑08‑09.”
Keep the email thread; the landlord’s reply (or lack thereof) becomes part of the evidence record. If the landlord disputes a finding, ask for a written acknowledgment of the issue and a timeline for repair.
When it’s time to move out, pull up the same checklist and compare it with the move‑out inspection. Anything that appears in both sets of photos proves it was pre‑existing, which protects your deposit.
For a deeper dive on lease language, the How to Read a Lease Agreement guide walks you through the most common clauses renters miss.
And if you want a quick way to spot risky clauses before you sign, try the First‑Time Renters Guide on our site. It highlights hidden fees and deposit traps in plain language.
FAQ: Move‑In Inspections and Lease Review
What should I do if I find damage during the move‑in walk‑through?
Document the damage with photos, note it on the checklist, and notify the landlord in writing right away. A written record shows you didn’t cause the issue.
How soon after moving in should I complete the inspection?
You should finish the checklist before you bring any furniture into the unit. That way you can see every surface clearly and avoid covering up existing problems.
Do I need the landlord’s signature on my inspection form?
Yes, a signed form from both parties makes the document legally defensible. If the landlord refuses, send them an email with the completed form and keep the email trail as proof.
Can I use a digital app instead of a paper checklist?
Digital apps work fine as long as they let you add photos, timestamps, and signatures. The key is that the information is stored securely and can be exported as a PDF for your records.
Is a move‑in inspection required by law?
Many states, including Arizona, Washington, and Michigan, have statutes that require landlords to provide a written condition report. Even where it isn’t required, having one protects you from unfounded claims.
How does LeaseGuard AI help with my inspection?
LeaseGuard AI scans your lease for risky clauses, flags missing inspection requirements, and generates a plain‑language summary you can use during your walkthrough. It’s an AI‑powered safety net for renters.
LeaseGuard AI provides informational analysis only; it is not a law firm.
Conclusion
Start with a signed, detailed checklist, capture timestamped photos, and match every finding to your lease. That routine keeps you protected and makes deposit disputes rare. Ready to audit your lease for hidden traps? Upload it to LeaseGuard AI and get a quick risk report.
This article is general information, not legal advice. Laws vary by state — verify details with your state's landlord-tenant statutes or a licensed attorney.
Check Your Own Lease Now
Everything in this guide applies to leases in general — but your lease may have specific clauses that need their own review. Upload it free.
Analyze My Lease — Free